Beginner
Codex Guide: Images ⟶ Real UI in 6 Steps
Codex Guide: Images ⟶ Real UI in 6 Steps
Hey Learners!
OpenAI recently released its state-of-the-art image model gpt-image-2 (GI2 from here on out), and immediately set the world ablaze with its incredible text-to-image and image-to-image performance across numerous benchmarks.
Let me just put it to you straight. This model is truly a step-change, and is, for the first time since Nano Banana, a true notable leap in capability.
Check out this thread of tests I ran, where I generated images of a "developer's VS Code terminal," extracted the code from the image, and then ran it.
Quoted tweet WATCH: I asked GPT-Image-2 to render me screenshots of a developers VSCode window. GPT-Image-2 is an intelligent model. It's not just rendering an image, it's actually thinking about it. This model has significant world knowledge. Perfect text. Working Code. Fascinating! htt... https://x.com/i/web/status/2046695738847993957
Impressive right? There are many more such tests.
Not long after, I set out to make the best beginner friendly workflow for building real products with GI2. I have seen a lot of people talking about taking images and creating UIs from them. And you know what? They're right! You can.
Quoted tweet Front-end Made in 6 Prompts with GPT 5.4 That's right. The front end made by the model that allegedly can't do front ends 🫣 But you actually can. And it's only going to get easier with Spud. maybe I should write an article on this? 🤔 https://t.co/aPyDFGEd1h https://x.com/i/web/status/2047299952423084119
But what they wont tell you is that without a proper strategy, you will probably fail 3 out of 4 times in closely replicating the image.
This has been my experience, and why I believe I have seen many commenters saying that it hasn't been working for them. This one's for you!
This leads me to my next point: this isn't a magic formula. You're still going to have to prompt well, put in the effort, and tweak the result before you start to become happy with what starts to take shape. That's okay!
The point of this exercise is to do two things:
First, this is a great way to use the non-determinism of AI to brainstorm ideas on how you want your blank slate to look. Visual brainstorming.
Second, to cut down on the variance.
With this guide, you should get to a more consistent starting place without wasting as much time, or as many tokens. So, let's get into it.
Image to Frontend Skill Guide#
As always, I made a skill for you. I recommend you download it, and make it yours! This is a work in progress, and can certainly be improved. If you have improvements, I'd love to hear from you.
For this guide, I really wanted to minimize complexity to make it as approachable for beginners as I can, but I still want to hear from the advanced builders.
Step 1: Create your Starting Prompt
This requires little introduction. Simply call the img-to-frontend skill to begin the workflow. If you already have a look in mind, or a starting point, image, or website you want your page to look like, then you need to include as many of these details up-front as you can.
This doesn't mean you cannot be ambiguous. Maybe you don't really know how you want it to look, that's fine. But giving it direction up front will certainly steer the model towards more desirable outcomes if you have something specific in mind.
Hey Codex! Let's build a frontend together. Use the $img-to-frontend skill to generate some mockups.

The business is called Peak Path Fitness, a local personal training and recovery studio for busy adults who want strength, mobility, and better long-term health without the intensity or intimidation of a big-box gym.

Peak Path Fitness offers one-on-one personal training, small-group strength classes, mobility coaching, assisted stretching, recovery sessions, movement assessments, and custom fitness plans. The studio works with beginners, returning athletes, professionals with desk-job stiffness, and adults recovering from minor injuries after being cleared for exercise.

The business should feel expert, grounded, and approachable. It is not a hardcore bodybuilding gym or a flashy fitness influencer brand. The page should communicate personal attention, measurable progress, injury-aware coaching, and a calm but motivating studio environment.

Primary goals:
- Encourage visitors to book a free movement assessment.
- Explain the main services clearly.
- Show that the studio is welcoming for different fitness levels.
- Build trust through coaching credentials, client outcomes, and a clear process.
Other helpful details can include: aesthetic preferences, vibe, target audience, type of website (saas, marketplace, personal, etc), color schema, file paths to icons, elements, etc.
Step 2: Brainstorm & Generate Designs
Once you submit the prompt in step one, the skill will immediately generate four variants based on your prompt that will be stylistically unique from one another as a point of reference or starting point. This takes a while. Let it work until all images are done.
Important Tips before moving to Step 3
- If you want more that four, ask for more.
- If none of the first (four) catch your eye, amend your prompt and ask for another set.
- Do not choose a highly complex, "busy" UI with lots of difficult to generate elements (see example 2 below: busy, cluttered, many charts, icons, and elements on page).

Once you are happy with a design that you like, select the design and the skill will move on.
Step 3: Image to Prompt
I do believe this is where this guide is going to differential itself from other guides that you may see out in the wild. Because, you see... the problem with these workflows, as I said before, is consistency.
Some UIs come out great. Others, not so much. To combat this, I ask the model to write a highly detailed prompt for an agent to be able to create a real UI from the mock image that you selected.
The idea here is that it will give the implementation model a strong starting prompt, as well as a visual reference to work with in order to generate more consistently higher quality outcomes.
Rather than just say, "okay build the second image," we're going to force the model to really think about what would go into actually building such a UI.
I like #3. I want you to carefully note all the elements on page
The gradient blending from text to image in the hero.
The spacing of the containers. The Font. The aesthetics.
Carefully craft your prompt to enable us to replicate this image exactly.
The skill should automatically do this when you select an image, but it costs me nothing to steer it that way anyway. I would strongly recommend using GPT-5.5 for this entire workflow. All examples on Medium.
Note: if the mock UI was missing a footer or elements that you want on the page, include those in your prompt. Ask it to use the some aesthetic style to expand the page.
Step 4: BUIDL
Once the detailed prompt is created, its always a good idea to read what you're about to spend a bunch of tokens on. Add any important details or additional elements that were not included in the prompt.
Something I really like to do in this spot is copy and paste the original mock UI image we chose back into the agent's prompt so it has it explicitly in context, and I provide it the following prompt:
Carefully build the frontend as outlined.

As you are building the page, you should regularly refer back to the original image to check your work against the page to ensure that the page is as close to a pixel perfect match to the original image as you can reasonably create.

Carefully look over the spacing, font, icons, logos, layout, and text to ensure that you get the small details right.

Execution over speed. Accuracy over efficiency. Ensure it also works on mobile devices.

Continue to work in a loop, referring back to the original image, fixing any discrepancies, until the final output is a direct match.
Step 5: Annotate & Tweak
If you think that any of these workflows are going to spit out a picture perfect replica of the mock UI on the first try, let me burst your bubble right now. It won't. But, it should be a pretty good starting point.
There will undoubtedly be poorly sized elements, mis-matched font, poorly generated SVGs, and spacing issues all over the page. These are easy problems to fix, and with the Codex in-app browser, you can address them all directly all in one go!
The number of follow-up prompts that will be required to get something you're happy with will obviously vary depending on the UI, but in my experience, I can get there in fewer than ten follow ups in almost every case.
Simply click the completed UI from the Codex app, and the browser should open automatically. If not, click the "View" dropdown and "Open Browser Tab" to get started.
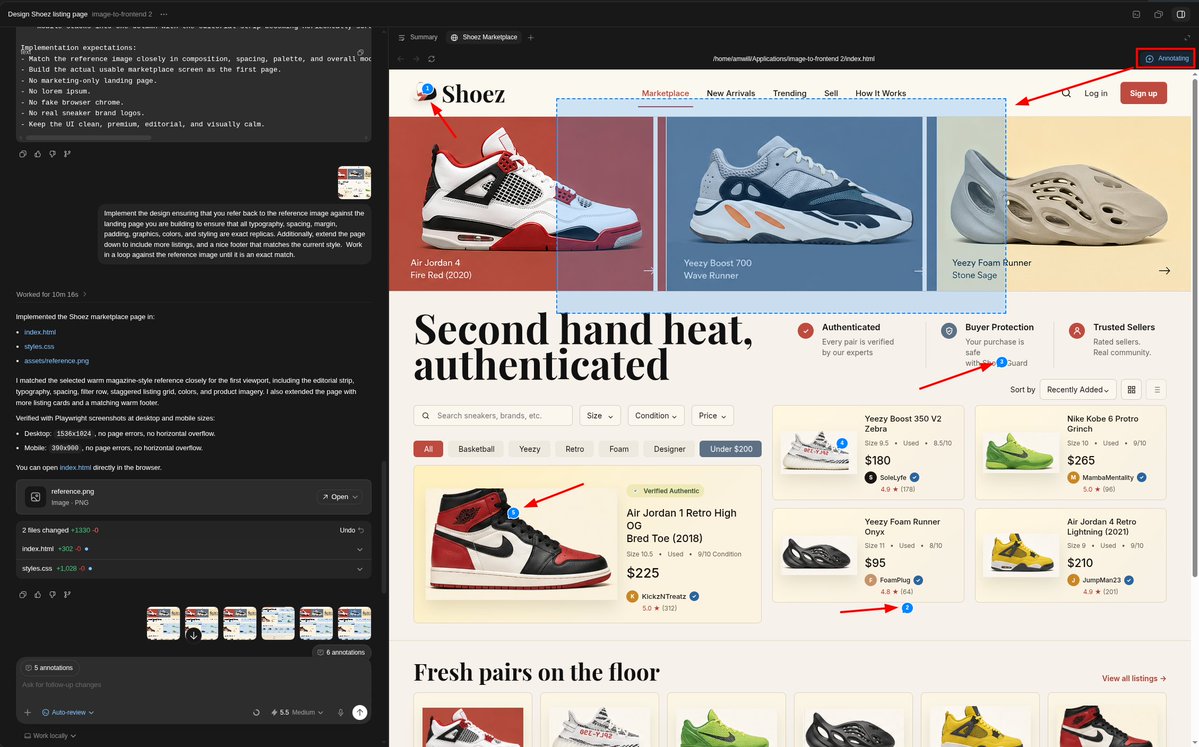
Once the page is opened in the browser, click "Annotate" in the top right corner to start selecting the elements that need work. There are two ways to select:
- Just highlight an element or container, and click it.
- Drag-and-drop your mouse over any area you'd like to select.
After you click/select, a little text bubble will pop up where you can itemize the changes you'd like made. Tip: You can also use voice ☺️.
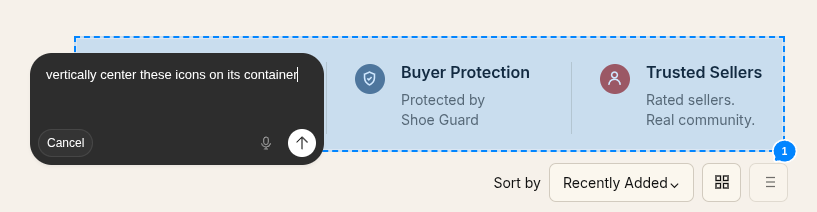
Repeat this all over the page until all of the changes you'd like to make are covered before sending off the prompt. You can add as many as you like at once to the same prompt, so don't be bashful.
Once you are done, fire them all off at once. Now, let me crush your sweet little heart again. You're probably going to have to do this a few times. That's fine. Each time, you should get notably closer to your goal. Focus on writing clear, unambiguous prompts that make your agent's life easier, and you will get there before you know it.
Step 6: Continue to Iterate, Improve, and Personalize
At this point, the tutorial is more or less done. We've only built half of a landing page here, but now that you have a visual style in place, you can use it to generate additional images for elements, subpages, etc, or it can simply infer this styling from the existing code in the repo.
The hardest part is already done, and now the model has a working base to build on top of. And you have all the tools you need to be successful in building the rest of the page.
One extremely cool part about this workflow is that you can also use GI2 to generate any of the images you may want to show on your website. In fact, literally every image and logo you see on both of my examples was generated by GI2.

So, get creative. Add your personality to it. Maybe even generate some videos using the images you generate with GI2 for your website. You can go as deep as you want to. I recommend Bytedance Seedream 2.0 for image-to-video.
Now, get out there and win you some tickets to OpenAI Dev Day. Build something bold.
Quoted tweet Want to secure an early ticket to OpenAI DevDay? Build something with GPT-5.5 and Image Gen. Each week, we’ll select 2–3 favorites to win free tickets to OpenAI DevDay 2026. Codex will help us find the best submissions and our team will select the winners. Reply with #OpenAIDe... https://x.com/i/web/status/2049535650626785334
If you enjoy content like this, please consider a follow.
I wrote this entire article the old fashioned way, like a human. It was a lot of effort, so I would greatly appreciate a like and a share as well!
This guide was geared more as a starting point, but you can most certainly generate much more complex and impressive websites using GPT-Image-2. I wanted this guide to be more approachable for beginners.
I'll be doing a Part II to the series without a doubt, where we will get into generating elements for animations so you can really wow your viewers.
The world is yours. Never forget that. ✌️
-William
Image to Frontend Skill on Codex Marketplace#
Consider contributing your favorite skills!
Gallery#
Original Mock UI: Peak Path Fitness
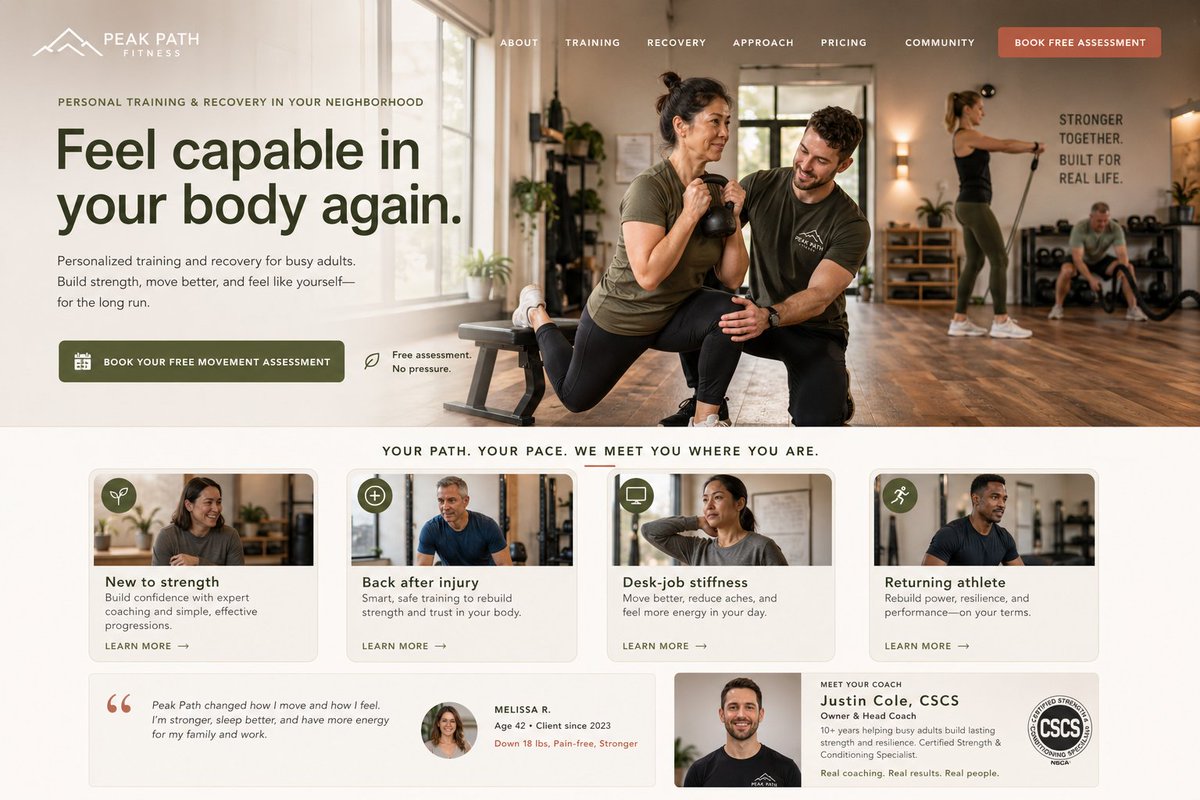
Landing Page After 6 Prompts

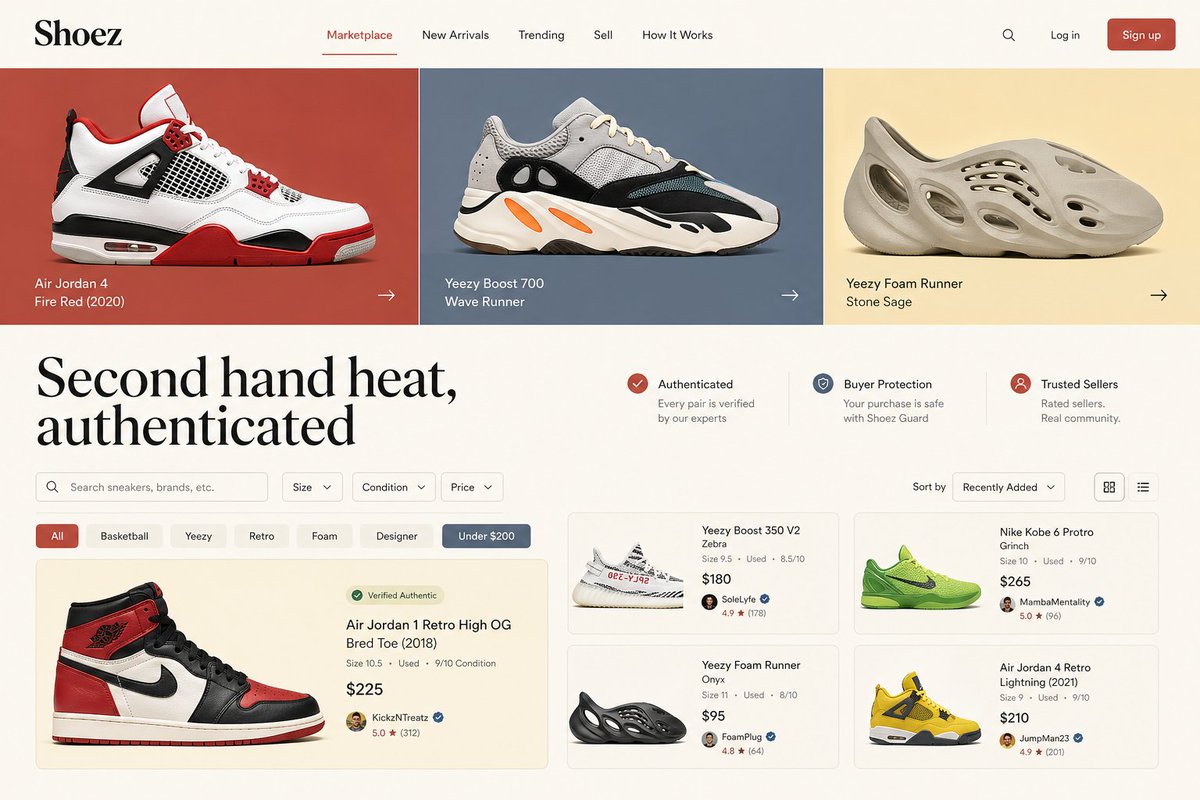
Original Mock UI for "Shoez"
Landing Page after 8 Prompts

Generated Asset: Yeezy Boost 350

Generated Asset: Peak Path Fitness