Beginner
Building a Personal Digital Asset Production Line with OpenClaw + Obsidian
Building a Personal Digital Asset Production Line with OpenClaw + Obsidian
Just read this part:#
We spend a lot of time every day talking to large language models. We ask what to eat today, what tasks to do, and what interesting things Teacher Baoyu, Auntie Yang, and Tiechui have posted.
But, often, it stops right there. The wild, divergent thoughts in between become fleeting clouds.
Useful ideas, unprocessed knowledge, jokes we didn't quite get—the moment we close the chat window, they all go to sleep in the ChatBox. Maybe one of Auntie Yang's ideas could have earned you a few hundred extra bucks, one of Baoyu's skills could have boosted your efficiency 100x, or one of Tiechui's coaching ideas could have gained you tens of thousands of followers...
And these, I'm sure the LLM saw them, but it didn't feed them back to me in real-time because it didn't receive the instruction to review. Once the review mode is activated, one afternoon I might receive: "Hey, Huang Yun, that idea about migrating viral content last week was pretty good. Actually, Teacher Baoyu has a WeChat Official Account Skill that can help you post automatically. Want me to try it for you?"
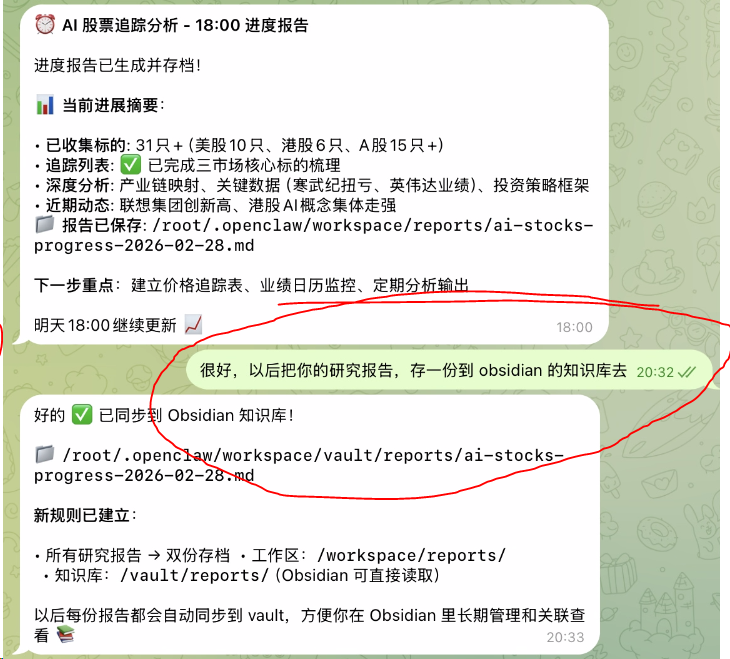
After using OpenClaw for two weeks, I found that dumping conversations into Obsidian to form RAW documents and promptly assigning an Agent to review them is very helpful for discovering knowledge blind spots—things I didn't know I didn't know.
At most, read this little extra bit—Usage Configuration:
- Remote VPS (OpenCloudOS) has OpenClaw installed
- OpenClaw conversations generate an Obsidian Vault directory
- Remote VPS and local Mac have Syncthing installed to sync file changes from the VPS Vault in real-time
- Local Mac has Obsidian installed for serious editing
- Secure Communication: TailScale (optional)
I want to thank Fan Zong @fankaishuoai on X for the reminder to use TailScale to sync Obsidian files between the two ends, ensuring security.
Thanks go at the front of the article because, by reading this far, hands-on folks will immediately go do it. The subsequent configuration is more useful to ask Claude/GPT than to read an article. So why am I still writing this? DDDD, you get the idea.
Let me pad the word count a bit more—Required Software:
- OpenClaw / Syncthing (Remote VPS)
- Visual Studio Code + Remote-SSH plugin (Local Mac)
- Obsidian / Telegram / Syncthing (Local Mac)
- TailScale (Remote VPS, Local Mac)
If you don't mind a long read, let's get to the main point—#
Installing OpenClaw, configuring SSH to connect to the remote VPS, connecting Telegram to send commands—there's plenty of documentation for these, so I won't elaborate.
Huh? You want to know how to write prompts for OpenClaw to create Obsidian articles? Try bossing it around like this:
This article focuses on sharing how, after OpenClaw generates an Obsidian Vault on the remote VPS, we can safely sync and edit it locally using the open-source software Syncthing.
Regarding the open-source software Syncthing, I mentioned it in a previous tweet:
Quoted tweet Bros, just discovered a magical tool that completely solves the pain of "files not syncing across multiple devices." Before: Cloud storage speed limits, and using SFTP felt like a caveman. Now Syncthing handles it all in one go, covering three scenarios: 1/ Win - Win LAN instant sync 2/ Win - Mac cross-platform 3/ VPS working directory syncs to local in real-time, edit directly https://t.co/u1m8ks2Iby What's your current solution? https://x.com/i/web/status/2025182109653238114
Below is my deployment environment. The remote VPS is a Tencent overseas server, 199 RMB per year. Locally, I use a Mac.
| Environment Configuration | VPS System | OpenCloudOS (RHEL/CentOS family) |
| :--- | :--- | :--- |
| VPS Login Method | SSH Key Login |
| Local System | macOS |
| Local Software Installed | Obsidian, VS Code + Remote SSH plugin |
Step 1: Install Syncthing on the VPS#
SSH into the VPS and execute the following commands:
# Download the latest version of Syncthing (Linux amd64)
wget https://github.com/syncthing/syncthing/releases/download/v2.0.14/syncthing-linux-amd64-v2.0.14.tar.gz

# Extract
tar -xzf syncthing-linux-amd64-v2.0.14.tar.gz

# Copy to system path and grant execute permissions
cp syncthing-linux-amd64-v2.0.14/syncthing /usr/local/bin/
chmod +x /usr/local/bin/syncthing

# Verify successful installation
/usr/local/bin/syncthing --version
[!tip] Note the Installation Path The installation path is/usr/local/bin/syncthing. This path will be needed later when configuring the service file.
Step 2: Create a systemd Service File#
[!warning] Manual Installation Requires Manual Service File Creation Syncthing installed via binary package does not automatically create a systemd service file. You must create it manually; otherwise, thesystemctlcommand won't find the service.
Create the service file:
nano /etc/systemd/system/syncthing@.servicePaste the following content:
[Unit]
Description=Syncthing - Open Source Continuous File Synchronization for %I
Documentation=man:syncthing(1)
After=network.target

[Service]
User=%i
ExecStart=/usr/local/bin/syncthing serve --no-browser --no-restart --logflags=0
Restart=on-failure
RestartSec=5
SuccessExitStatus=3 4
RestartForceExitStatus=3 4

[Install]
WantedBy=multi-user.target
Command Parameter Explanation:
| Parameter | Meaning |
| :--- | :--- |
|
/usr/local/bin/syncthing | Full path to the syncthing executable |
| serve | Start the syncthing sync service |
| --no-browser | Do not automatically open a browser on startup (server has no desktop environment, must add) |
| --no-restart | Do not auto-restart after process exit (let systemd manage it to avoid conflicts) |
| --logflags=0 | Simplify log format |Save and exit:
Ctrl+X → Y → EnterStep 3: Start and Verify the Service#
# Reload systemd configuration
systemctl daemon-reload

# Set to start on boot + start immediately
systemctl enable syncthing@root.service
systemctl start syncthing@root.service

# Confirm running status
systemctl status syncthing@root.service
Seeing
Active: active (running) means success.Step 4: Install Syncthing on Mac#
# Install
brew install syncthing

# Set to start on boot and start it
brew services start syncthing
Mac-side management interface: Open a browser and visit
http://localhost:8384Step 5: Access VPS Management Interface via SSH Tunnel#
Syncthing on the VPS only listens on local
127.0.0.1:8384 by default and cannot be accessed directly from outside. It needs to be forwarded via an SSH tunnel:# Execute this in a new terminal on your local Mac (replace with your VPS info)
ssh -L 9384:127.0.0.1:8384 your_name@your_vps_ip -NThen open
http://localhost:9384 in your browser to see the Syncthing management interface on the VPS side.[!note] About the-NParameter-Nmeans only establish the tunnel, do not execute remote commands. The terminal will hang, just keep it open. Closing the terminal disconnects the tunnel.
Step 6: Add Devices to Each Other on Both Ends#
Get Device ID:
- Mac side: Open
http://localhost:8384Top rightActions→Show ID - VPS side: Open
http://localhost:9384Same operation
Add VPS on Mac side:
- Open
http://localhost:8384 - Click
Add Remote Deviceat the bottom right - Paste the VPS's Device ID
- Fill in device name as
vps, save
Confirm connection request on VPS side:
- Open
http://localhost:9384 - See the connection request from Mac, click
Add Device, confirm and save
When both ends show the other's device and the status is
Connected, pairing is successful.Step 7: Configure Sync Folder#
Share the vault directory on VPS side:
- Open
http://localhost:9384 - Click
Add Folder - Fill in:
- Folder Label:
obsidian-vault - Folder Path:
/your_path_to/vault(your actual path)
- Folder Label:
- Switch to the
Sharetab, check the Mac device - Save
Accept sync on Mac side:
- Open
http://localhost:8384 - See the folder share request from VPS, click
Add - Local Path fill in:
/Users/your_username/obsidian-vault - Save, initial sync begins
Step 8: Open Synced Directory in Obsidian#
- Open Obsidian
- Click
Open another vaultat the bottom left - Choose
Open folder as vault - Select
/Users/your_username/obsidian-vault
Optional: Ignore Obsidian Conflict Files#
Create a
.stignore file in the obsidian-vault directory to ignore files that don't need syncing:// Obsidian workspace state, maintained separately per device
.obsidian/workspace.json
.obsidian/workspace-mobile.json
// Mac system files
.DS_StoreOptional: Secure with TailScale#
The Syncthing setup above has security risks:
- Syncthing's port 22000 is exposed to the public internet
- Traffic might pass through third-party relay servers
- Device IPs are reported to the global discovery server
Tailscale's role: Establish a private, encrypted network based on WireGuard between the VPS and Mac. All Syncthing traffic goes through this internal network, completely unexposed to the public internet.
Architecture Comparison#
Before Reinforcement:
Mac ──── Public Internet ──── VPS:22000 (Port Exposed)
          Possibly via third-party relay servers
After Reinforcement:
Mac ──── Tailscale Private Network (WireGuard Encrypted) ──── VPS
         100.x.x.x Private IP, completely invisible on public internet
         Syncthing communicates only within the internal network
Step 1: Install Tailscale on VPS#
SSH into VPS, execute:
# Official one-click install script (supports OpenCloudOS)
curl -fsSL https://tailscale.com/install.sh | sh

# Start the daemon and set to start on boot
systemctl enable --now tailscaled

# Log in (will output an authorization URL, copy and open in browser)
tailscale up
After logging in, check the assigned Tailscale IP:
tailscale ip -4
# Returns an address like 100.x.x.x, note it down
Step 2: Install Tailscale on Mac#
[!warning] Mac Must Install the GUI Version Cannot just install the CLI version. Tailscale on Mac needs the menu bar App to manage VPN configuration.
# Install GUI version (with menu bar App)
brew install --cask tailscale
Or download directly from the official website: tailscale.com/download
Post-installation steps:
- Open LaunchpadClick Tailscale
- If the menu bar icon doesn't appear: Open
System Settings``Privacy & SecurityScroll to the bottom, findTailscale system extension has been blockedClickAllowWhen the VPN configuration request pops up, clickAllowReopen the App:pkill -f Tailscale && open /Applications/Tailscale.app - Click the menu bar icon
Log in→ Log in with the same account
Verify connectivity between both ends:
# On Mac, ping the VPS's Tailscale IP
ping 100.x.x.x

# On VPS, view all devices
tailscale status
If you can ping successfully, the private network is established.
Step 3: Configure Syncthing to Use Only Tailscale#
VPS Side
Open the VPS's Syncthing management interface via SSH tunnel:
# Execute locally on Mac, establish SSH tunnel
ssh -L 9384:127.0.0.1:8384 your_vps_name@your_vps_ip -N
Open
http://localhost:9384 in browser.Modify Listen Address:
Settings → Connections → Sync Protocol Listen Addresses, change to:tcp://100.x.x.x:22000(Replace with the VPS's Tailscale IP, must include
tcp://)Disable Global Discovery and Relays: Same page:
- Uncheck
Global Discovery - Uncheck
Enable Relaying
Mac Side
Open
http://localhost:8384Modify the VPS device's connection address: Find the VPS device →
Edit → Change Address to:tcp://100.x.x.x:22000Also disable Global Discovery and Relays.
Step 4: Close Public Internet Access to Port 22000 on VPS#
# Remove public internet access rule for port 22000
firewall-cmd --permanent --remove-port=22000/tcp
firewall-cmd --reload

# Confirm it's closed
firewall-cmd --list-ports
Step 5: Directly Access VPS Management Interface via Tailscale IP (Optional)#
With the Tailscale private network, you no longer need the SSH tunnel:
VPS Side Syncthing →
Settings → GUI → GUI Listen Address change to:100.x.x.x:8384(Replace with the VPS's Tailscale IP)
Afterwards, directly visit
http://100.x.x.x:8384 from your Mac browser.This is safe. Only devices under your Tailscale account can access this Tailscale IP; it's completely invisible on the public internet.
Phew, finished writing~